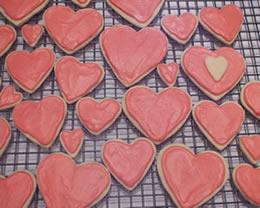
The Frosting on the Cake
Few celebrations are complete without cake or at least some type of fancy dessert. One look at the bakery counter and you’ll see what makes them “fancy” – swirls, stars, and loops. Whether it’s frosting or whipped cream, a little decoration on the top of your favorite confection goes a long way. And I bet you didn’t know that it is sometimes easier to decorate the top of a cake than to just frost it. Trying to make the top of that cake look smooth can often be “trying”. So be brave. Get a frosting bag, a few decorating tips, and decorate your way to a stunning dessert.
 The Right Tools
Visit your local craft or variety store and ask for the cake-decorating section. While you may be bewildered by the variety of decorating tips and other supplies, start with the following list, which should cost under $25 (turntable is about $10). If you really like this activity, you can always go back for more.
decorating bag(s) – one for every color you want to use on one project – plastic lined cloth is best, plastic is okay, clear disposable if you don’t care about re-using them
plastic couplers – one for every color you want to use on one project – couplers hold the decorating tips in place and allow you to switch tips for the same bag of frosting
 decorating tips – how many and what types are up to you – see the chart below to determine what shapes you want to create
paste food coloring – paste coloring is far superior to liquid drops to color icing/frosting – the liquid dilutes your frosting and it is very difficult to achieve desired colors while maintaining workable frosting
turntable – while this is not essential, it is very useful, allowing you to gradually rotate your cake as you decorate so you can be more consistent in application
| Decorating Tip (various sizes available) | Shapes/Uses |
| Open Star | Borders, Shells, Flowers, Fleur-de-lis |
| Basket | Basket weave, borders |
| Leaf | Leaves, “Ribbon” border |
| Open Round | Dots, Writing, Decorative scrolling |
 Quality, Not Quantity
First things first – please make your own frosting. The purchased type in a can tastes, well, “canned”. A simple buttercream from any cookbook will do. If you’re more adventurous, try a meringue buttercream or a slightly stiffened whipped cream. Always use quality ingredients. No one wants to eat a flavorless cake, no matter how good it looks.
Next, apply a thin layer, or “crumb coat”, of frosting to your cake (freezing the cake layer ahead of time will make this easier). Chill to set the frosting. Then frost any areas, such as the sides, that will not be heavily decorated. Don’t worry about making the edges perfect – you’ll probably cover the edges with decoration anyway. Chill again.
While the cake is chilling, assemble your frosting tools and practice your desired shapes on waxed paper (or a graham cracker if you want to nibble).
Instructions
1. Trim tip of decorating bag, according to directions. Place coupler inside of bag.
2. Fill bag 1/3 to 1/2 full of frosting.
3. Add desired decorating tip to outside of bag and secure by screwing on ring of coupler.
4. Make sure there are no air bubble in the bag and fold down the top of the bag to seal. Grasp bag at the top with one hand, steady with the other, and squeeze frosting down into tip. (Practice WILL make perfect.)
5. Practice your desired shape:
| Classic border | Use an open star tip. Hold bag at a 45 degree angle. Starting on the cake surface, apply pressure while moving up, over, and back. Release pressure when you reach the cake surface again. Repeat, covering end point from first decoration. |
| Rope border | Use an open star tip. Hold bag at a 45 degree angle. Starting on cake surface, apply pressure while creating an “s”, releasing at the end of the shape. Repeat, starting the next shape inside the second curve of the “s”. |
| Ribbon border | Use a leaf tip. Hold bag at a 45 degree angle. Starting on cake surface, apply continuous pressure as you move the bag up, over, and back. |
| Basket weave | 1. Use an open tip to create the vertical lines of the basket (yellow frosting in basket weave photo). 2. Use a basket tip. Hold bag at a 45 degree angle and move horizontally from the edge of a line, over the next line, to the edge of the third line, repeat. For the next line, cover the lines you skipped in the first round. Repeat again, covering the original lines, etc. |

6. Time to decorate the cake! Chill as you go to “set” the decorations.